Treat Yourself Like Royalty With These Spa Day Tips #NationalPrincessDay

Wednesday, November 18th is National Princess Day – and even if you aren’t actually a princess, you can still celebrate by treating yourself like royalty with a luxurious and pampering spa day worthy of the Duchess of Cambridge.

To plan a DIY spa day, look no further than TheSoul Publishing’s popular 5-Mintue Crafts Girly YouTube page for spa tips that will help you relax and channel your inner nobility. A few of the tips include:

  • Activated charcoal has numerous benefits for your skin, from unclogging pores to smoothing texture; start your spa day with a DIY charcoal bath bomb made with baking soda, activated charcoal, citric acid, and essential oils (instructions here).
  • Exfoliate your skin with a homemade citrus scrub that smells as good as it feels! Mix sea salt, orange zest, lemon juice, and oils for a luxurious scrub that removes dead skin cells (instructions here).
  • Revitalize limp hair or split ends with a nourishing hair mask made with household items: just mix crushed aspirin and shampoo, and let it sit on your hair for a few minutes. You’ll notice an immediate difference (instructions here).

Sally Hansen x Madeline Poole May Trend: Negative Space

When it comes to nail trends, Sally Hansen Global Color Ambassador Madeline Poole is the expert on what’s hot. This season, she reports that Negative Space is the trendiest and easiest nail art look you can create at home with Sally Hansen nail polish.

“Fashion week Spring 2017 saw tons of nails in this style on the runway” reported Madeline, “such was the case at Proenza Schoeler and Vera Wang.” Negative Space design makes a feature of empty space and asymmetry, something seen not only on nails this season, but also in the collections of designers like Christopher Kane, who showed sheer paneled negative space dresses.
The Negative Space trend is simple to create yourself. All you need is a regular bobby pin, Sally Hansen Miracle Gel in Creme de la Creme and Miracle Gel Top Coat. The #1 no light gel system, Miracle Gel will make your nails on-trend for up to 14 days of color and shine. See below for an easy step-by-step!
Step 1: Starting with clean nails, apply the “Negative Space” design with Miracle Gel in Creme de la Creme to your nails using the bobby pin.
Step 2: Apply a coat of Miracle Gel Top Coat to seal your mani. It’s that easy!

SALLY HANSEN MIRACLE GEL SUMMER COLLECTION

[gdl_gallery title=”GALLERY_TITLE” width=”GALLERY_WIDTH” height=”IMAGE_HEIGHT” galid=”1″ ]
Give your nails the royal treatment! Sally Hansen Miracle Gel will keep your manicure looking majestic with up to 14 days of color and shine. The revolutionary, #1 zero light gel manicure system boasts seven new splendid hues in its “Royal Splendor” collection. The Miracle Gel2X Volume Top Coat must be used in tandem with the Miracle Gel shades to experience the long-lasting benefits of its no-light curing technology.


The “Royal Splendor” collection features seven new regal shades:


  • Plush Blush This powder pink features a Hall Of Mirrors-esque iridescence
  • Frill Seeker Stop searching, you’ve arrived at the perfect resplendent, creamy-peach shade
  • Regal Rosé Wine and dine — or let them eat cake — in a sparkling pale peony
  • Mauve-olous Take the throne in this beige-tinged medium-pink tone
  • Off with her Red! Hold court with this vibrant, true red
  • Can’t Beet Royalty Bring it to the boudoir in this rich maroon
  • Prince Char-mint A refreshingly Versailles-worthy pale verdant hue

When applied over the Miracle Gel shades, the Miracle Gel Top Coat volumizes as it protects – more chip-resistant than regular nail polish! Once applied, this gel top coat provides a high-gloss finish and mirror shine. The result: The look of a gel manicure at home, without the trip to a salon! Miracle Gel’s two-step application is super-simple. First, apply two thin coats of Miracle Gel color to clean, bare nails. Then, apply one coat of the Miracle Gel Top Coat. Natural light cures the polish, yielding a manicure that resembles a UV / LED cured gel polish. It removes easily with regular nail polish remover.

Price & Availability: The Miracle Gel™ Royal Splendor Collection, SRP $9.99 each, hits shelves beginning July 2016.

Sally Hansen 1 Sally Hansen 2 Sally Hansen 3 Sally Hansen 4 Sally Hansen 5 Sally Hansen 6 Sally Hansen 7

Pretty Summer Feet – Beauty Tips

52079154 The 2016 Los Angeles Film Festival Lowriders Premiere held at The Arclight Cinemas in Hollywood, California on 6/2/16. The 2016 Los Angeles Film Festival Lowriders Premiere held at The Arclight Cinemas in Hollywood, California on 6/2/16. Eva Longoria FameFlynet, Inc - Beverly Hills, CA, USA - +1 (310) 505-9876
52079154 The 2016 Los Angeles Film Festival Lowriders Premiere held at The Arclight Cinemas in Hollywood, California on 6/2/16.
The 2016 Los Angeles Film Festival Lowriders Premiere held at The Arclight Cinemas in Hollywood, California on 6/2/16.
Eva Longoria FameFlynet, Inc – Beverly Hills, CA, USA – +1 (310) 505-9876

Since we learned to walk, our feet have been supporting us. They walk us anywhere we want to go. They get us to the bus stop with three seconds to spare. And they dance into the early house in crazy high heels. For most of the year, we take our feet for granted. But in the summer months when the socks come off, we can no longer ignore them. Follow our simple steps to pretty summer feet.

  1. Scrub

This sounds obvious but in the summer months we sweat more. It’s important to keep feet clean and smelling fresh. Wash your feet at least twice a day. Scrub them with a brush and warm soapy water. Or, create a DIY foot scrub. Apply a generous amount of foot cream to keep them moisturized.

  1. Comfortable Shoes

The summer months are a great excuse to ditch the high heels. Not all of the time, of course, but for at least some of the time we can enjoy flats and sandals. Combine style and comfort with a pair of sandals, like Uggs. Shop around for an Ugg coupon code and other promos.

  1. Heels

Heels can be a problem area. They are a pressure point on our feet, and often hard skin builds up. After a while, it becomes dry and can crack. This is unsightly and painful. Treat yourself to regular at-home pedicures to remove hard skin. Use a foot file or pumice stone and gently rub away the problem areas. Always apply a good quality foot cream to prevent skin from drying out.

  1. Toenails

Keep toenails neat and short. Cut them regularly with toenail clippers. Cut straight across to avoid ingrowing toenails. File rough edges with an emery board.

Toenails are prone to fungal infections, and so it is important to keep them trimmed and clean. Apply some tea tree oil after cutting, to prevent infections.

  1. Nail Polish

Nail polish is the final touch if you’re wearing peep-toe shoes or sandals. However, don’t wear it all the time. It is important for your nails to rest.

  1. Blisters

Blisters are more common in the summer months. People tend to walk more when the weather is warmer. Blisters are caused by rubbing. Make sure your shoes fit well and wear them in before wearing them for long periods of time. Opt for shoes with absorbent insoles to absorb sweat. Or, alternatively, wear socks. This will prevent your feet slipping and sliding inside your shoes and rubbing against the sides. Keep some plasters in your handbag in case a blister develops.

  1. Sun Protection

When applying sun cream, don’t forget your feet. They need protection like every other part of your body. Apply a sunblock liberally and ensure you keep it topped up throughout the day.

  1. Smelly Feet

Your feet contain more sweat glands than any other part of the body. Odor is caused when the sweat breaks down. To prevent smelly feet take the following precautions:

  • Keep feet clean
  • Don’t wear the same shoes every day
  • Apply antiperspirant
  • Use insoles that can be removed and replaced
  • Wear shoes that allow air to circulate


Follow these simple steps to pretty, sandal-ready feet.

collaborative post

Sparkling Ice Cocktails – Celebrate Mardi Gras

Mardi Gras begins next week, so I wanted to share some fun and refreshing cocktail recipes from SPARKLING ICE – a great tasting, lightly carbonated, zero-calorie beverage which combines sparkling water, fruit juice, vitamins, antioxidants, and BOLD natural flavors.

Bourbon Street Black Raspberry Brut

unnamed-11

Ingredients

1 ½ oz. Silver Tequila
2 oz. brut Champagne
7 large black raspberries
2 oz. Sparkling Ice Black Raspberry
¼ oz. lemon juice
Instructions

1.Muddle black raspberries, Sparkling Ice Black Raspberry and lemon juice in a glass.

2.Pour ingredients into a glass filled with ice.

3.Add tequila, stir, and strain into a large rocks glass filled with ice.

4.Top with brut Champagne and garnish with a skewered black raspberries.

Lemonade Hurricane

unnamed-12

Ingredients:

2 oz. Sparkling Ice Strawberry Lemonade
1 oz. light rum
1 oz. dark rum
½ oz. passion fruit juice
1 oz. orange juice
Strawberry and Lime for garnish
Instructions:

Stir all ingredients together with ice.
Pour into a tall glass over ice.

Sparkling Whiskey Sour

unnamed-14

Ingredients

.5 oz fresh-squeezed lemon juice
1.75 oz Sparkling Ice Lemon Tea
1.25 oz Bourbon
.25 oz simple syrup*
*Low calorie option: Omit .25 oz simple syrup, add one packet of Splenda.

Instructions:

1.In mixing cup add ice, lemon, bourbon and Sparkling Ice.

2.Stir and strain over rocks.

3.Garnish with a cherry

Style Slam at American Craft Council Show in Baltimore

IMG_2333

Handcrafted fashion is as relevant today as it was when the American Craft Council (ACC) began its shows in the 1970s. This year, in an effort to highlight ACC’s talented network of fashion wearables, accessories and jewelry artists, ACC is partnering with regional stylists for its newest exhibition, Style Slam.

Four regional stylists will participate in Style Slam at the American Craft Council Show in Baltimore, which is being held at the Baltimore Convention Center, February 19-21, 2016. Each stylist will work with ACC’s network of artists at the Show to demonstrate how handcrafted statement pieces are the perfect fit for any fashion-conscious wardrobe.

On Friday, February 19, the stylists will be scouting the show floor looking for those fabulous fashion finds they’ll use to visually articulate their signature styles in person, on mannequins and model and online throughout the show. On Saturday, February 20, the stylists will be offering show attendees fashion tips, doing member makeovers and collaborating with participating interior designers from the Make Room: Modern Design Meets Craft exhibition on commentary related to the intersection of fashion and design. Throughout the Show, stylists will be available at the Style Slam booth to discuss how attendees can incorporate craft pieces into their own wardrobe to complement and accentuate their style.

Stylists participating in Style Slam are:

ABOUT THE AMERICAN CRAFT COUNCIL

No one understands the world of artful living better than the American Craft Council. The national nonprofit educational organization has been shaping the artisanal craft movement for decades, serving as a craft chronicler, tastemaker, convener and provocateur through its bimonthly magazine American Craft, annual juried shows presenting artists and their work, thought leadership conferences, awards for excellence, research library, workshops and seminars. For additional information visit craftcouncil.org or follow us on Facebook at facebook.com/CraftCouncil and on Twitter at twitter.com/craftcouncil.

DIY Floral Hairstyles from Boston Salon Owner

Fact: nothing screams summer beauty more than flowers in the hair! So, how do you rock this look even if you’re not at a musical festival? Boston salon owner and 30-year industry veteran Mario Russo of Salon Mario Russo has provided some “hair-spiration” for ladies who would love to sport blooms, but aren’t sure of the best way. We love a good flower crown, too, but in the office…? Not so much!

 Below, please find two DIY hairstyles with just the right amount of summer fun!  Incorporate small and simple flower accessories that are perfect for any day and event.

image001 (5)

image002 (1)

 Side Fishtail Braid

  1. Start with hair parted to the side. Take a front section of hair and Dutch braid hair along the hairline. Repeat with a smaller section of hair on the opposite side of your part. Tie off both braids with clear elastics.
  2. Gently pull apart each Dutch braid for added thickness and “messiness” and spritz with Oribe Dry Texturizing Spray to help with texture.
  3. Keeping the Dutch braids off to the sides, gather the top section of the rest of your hair (as if creating a half-up, half-down style), twist once and pin to condense hair and add volume before completing the full braid.
  4. At the nape of your neck, gather all hair to the side, with the exception of the side braids, and create a fishtail braid.
  5. Gently pull apart the braid for a full and messy look, and spritz this braid with Oribe Dry Texturizing Spray.
  6. Pull the side Dutch braids back to meet the fishtail braid and pin in place. Hide the ends of your Dutch braids by tucking them under the fishtail braid at the base of your neck. Continue pinning until all braids feel secure and complete the look with a spritz of Bumble and bumble Does it all.
  7. Insert flower pins throughout the braids. Keep it simple yet elegant by adding 4-5 small flowers. No need to overdo it!

image007

image005 (2)

Bohemian Braid Crown

  1. Start with hair parted in the center. Take two small sections of hair at the front and braid loosely on each side. Secure with clear elastics.
  2. Pull apart braids for added thickness and “messiness” and spritz with Oribe Dry Texturizing Spray to help with texture.
  3. Placing these braids to the side, gather the top section of the rest of your hair as if creating a half-up, half-down look. Split this section of hair into three parts in preparation for a third larger braid.
  4. Add the two side braids to the two outside sections of hair and begin one large braid at the back of head. Braid all the way down to the ends of hair and tie off with an elastic. Gently pull apart this braid and spray with Oribe Dry Texturizing Spray.

Tip: For an even more care-free bohemian style, get rid of the elastic altogether and backcomb hair at the end of the braid while spritzing with a strong-hold hair spray. The look will stay all day!

  1. Use a 1” curling wand to loosely curl the rest of your hair.
  2. Pin side braids down to your head to keep them from sticking out, then insert your flower pins sporadically throughout the style. Once again, don’t overdo it! A few flowers go a long way.

Hostess Gift Ideas and DIY Inspiration

How many times have you been invited to someone’s home and asked yourself, “what should I give the hostess?”  Proper etiquette states that we should gift something that “evokes a memory” but we want to be creative and thoughtful.

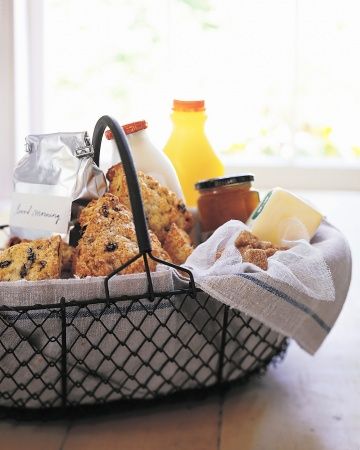
My first suggestion would be to consider the occassion.  Is this a housewarming party or game night?  Next, take inventory of small trinkets you already own.  Have you purchased a beautiful basket or set of mason jars?  Also, try to think of the interests or hobbies of the hostess.  Does she enjoy cooking or gardening?

Ultimately, giving the perfect gift can be delightful for both you and the hostess.  You’re adding a special touch to sincerely say, “thank you for having me at your home!”

Hostess Gift Ideas

e330a2b9e431fe92b927e649c4e30f05 4d57e054840cba472a5246ed25e91d5c 7b85591ce1876144aa7c2d61480c7f28

7f2faf552c12b3d657b9b0d0bc207882


Photos can be found from Pinterest.com

High Fashion and Beauty Tips on a Budget

High fashion – what does it mean? Is it the vintage dress you purchased or the couture you snapped up during Paris Fashion Week? Is it the makeup counter or the latest in organic, chemical free, coeliac-friendly eyeliner? Or is it the DIY dress you crafted out of patches, old material and threads of fluff?

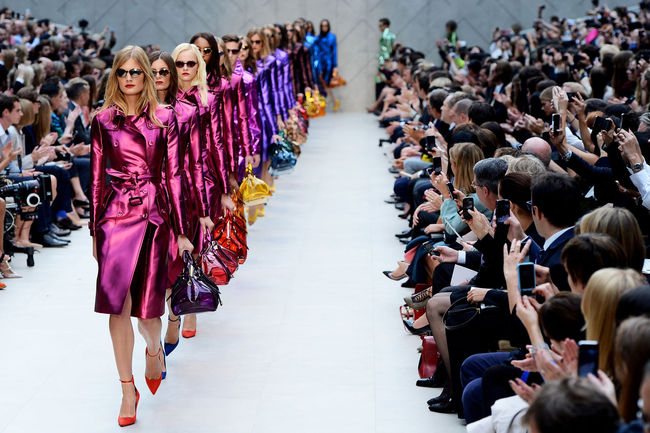
The truth is that it can be all this and more. While the catwalk are brimming with avant-garde styles and designers, the high street can offer replicas at cut prices.

With that in mind, what can you do to make the cheapest styles look like the height of fashion?

The right start to your day

You wake up looking bloated, tired, haggard and a bit like 20-tonne granite sandbags have been placed under your eyes. It’s not a start to your day that screams style, is it?

But that grim feeling doesn’t have to last long if you’ve got the right level of cleanliness at your disposal. So climb out from under your blankets and follow these tips to feel classy come morning.

To start with, throw those expensive beauty products in the bin. They’re brimming with chemicals that could strip the skin or scalp of its many nutrients.

Instead, invest in sodium free shampoo and a chemically neutral body wash. The lack of additives rubbing into your skin will make it look better with every new day you wake up. Top this effect off with a pint of water every morning. It’ll take the edge off your morning coffee and give your skin an extra boost.

wen
Color is king

You’ve probably seen fashion victims wearing colors more garish than a neon Dulux wall chart with sick on it. Pity those poor souls who can’t coordinate colours – just make sure that pity isn’t reciprocated.

Matching the right colors is the key to making even the cheapest outfits look like they were cut by Ralph Lauren himself. Loud primary colors must be offset by a cheeky pattern or quiet colour to tone the outfit down.

Think of mixing the right colors as like walking a dog – sometimes you have to let your dog roam free, but other times that hound has to be held on its leash.

DIY

Trying to define genius in design is like trying to hold an abstract concept in your hands. But at least one factor is easy to put your finger on – personality.

Provided, personality shouldn’t be a difficult thing to find. The craft is the tricky part.

So pick up a few high street items of clothing and see what alterations you can make to give it your unique touch.

London-Fashion-Week

DIY: Creating Inexpensive {Last Minute} Gift Ideas

I like to give holiday gifts to my kids teachers and special friends in the community.  Unfortunately, the budget doesn’t always allow for expensive gifts.  I would love to purchase (everyone) something special from Bloomingdales but that’s not always realistic.

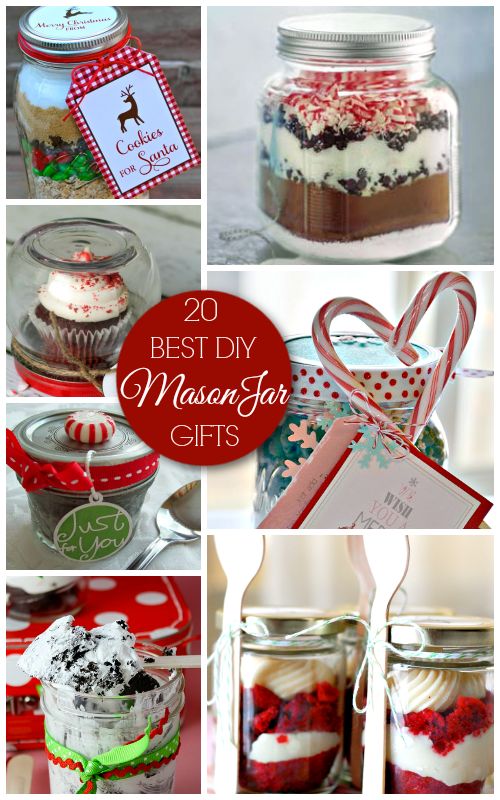
Being a true southerner, I come from a family that loves arts and crafts and this time of the year inspires me to pull out the ribbon box.  I search for inexpensive gift ideas such as baked cookies, mason jar trinkets, or gift baskets.

Honestly, anyone (whether they love arts and crafts) can add a special touch to gift giving.  The trick to DIY gift ideas is figuring out what inspires you and those people in your life.

Below, you will find ideas from Pinterest that can be prepared in 10 minutes or less.

Steps for DIY Inexpensive Holiday Gifts:

1.  Create a budget for the project.

2.  Make a list of supplies.

3.  Locate your favorite craft store and ask for assistance (if that’s needed.)

4.  Set up your holiday craft station and create!

97bb7cddfccf5b396b935988bf7ec33a

114ce0e19e13242ba5d4c27a394b6d7e

c892abbaab86dd1ea264a79585f0f90d

2f04f1609740548e20cc9dbd8728c5d0

59713b9eef1ea68666788a022e164133

2c6b6a4957770aef2f7afe57f175f601

3e9ac45516ea68539b81d4310fbb9390

65021a53f7518cfadfee4d53c296abf8